Our Valheim server runs with BepInEx, the framework Valheim loads mods with. It works fine without mods, but you can also add single mods or a whole modpack.
The settings under Startup
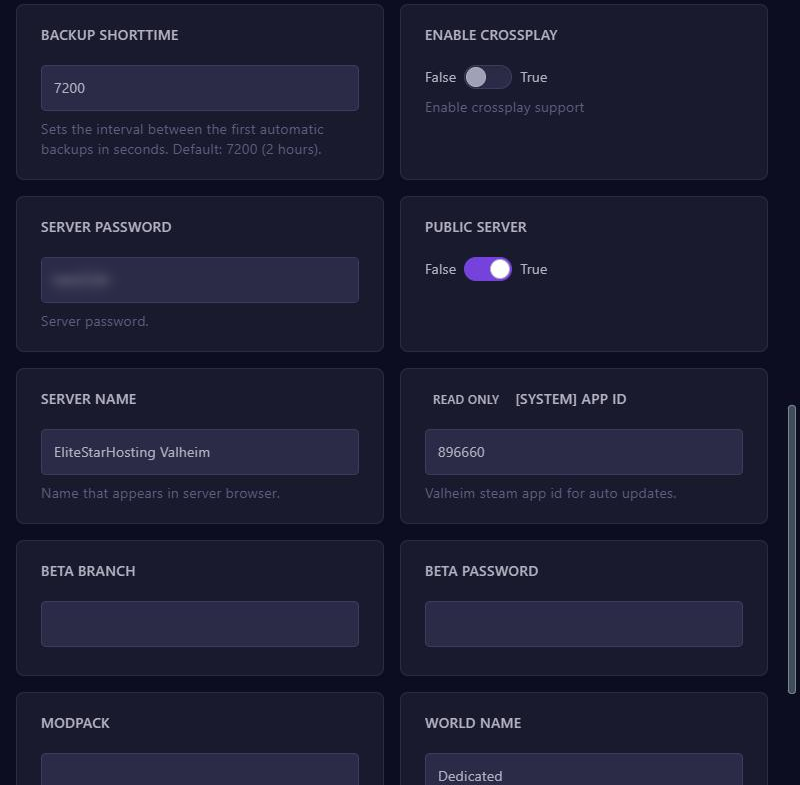
- SERVER NAME: the name in the server list.
- SERVER PASSWORD: required, 5 to 20 characters. Use a password that isn't part of the server name.
- PUBLIC SERVER: with True, your server is in the game's list. With False, players join with the address.
- ENABLE CROSSPLAY: also lets players on Xbox and Game Pass join.
- WORLD NAME: the world the server loads. A new name gives a new world; the old one stays saved.
- BACKUP COUNT and the three other BACKUP fields: how often Valheim saves and how many backups of its own it keeps. By default it saves every 30 minutes.
Restart your server after a change. Players join through your server in the list, or with Join IP and the address with the port from the panel.
With crossplay, the connection runs through Microsoft's services, and players can also join with the join code from the console. Players on Xbox can't install mods. If you use mods that everyone needs, they can't get in.
Installing single mods
You find mods for Valheim on Thunderstore.
- Download the mod and unpack it on your computer.
- In the panel, open Files and go to
BepInEx/plugins. - Upload the mod's .dll file, or the mod's folder, with Upload.
- Restart your server.
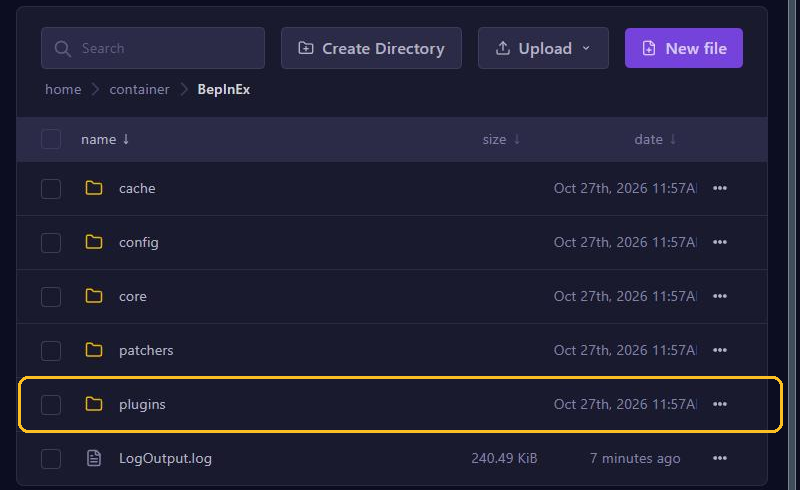
After its first start, a mod often creates a settings file in BepInEx/config. Change it with your server stopped. If a mod doesn't work, check BepInEx/LogOutput.log. You read more about uploading in Manage files.
Players need the same mods
Most mods have to be on the server and with every player, in the same version. Players install them most easily with r2modman or the Thunderstore Mod Manager. A mod's Thunderstore page says whether it only needs to be on the server. Mods that only change your own screen, such as a minimap, don't belong on the server.
A whole modpack in one go
- On Thunderstore, copy the modpack's Dependency string, for example
Maker-PackName-1.2.3. - Fill it in at MODPACK under Startup.
- Make a backup and choose Reinstall Server under Settings.
When reinstalling, the server empties BepInEx/plugins and puts the modpack's .dll files in it. Put back any single mods you had uploaded yourself afterwards. If a mod in the pack needs files other than a .dll, upload those yourself. When a new version of the modpack comes out, fill in the new dependency string and reinstall.
Your world and admins
Your worlds are in .config/unity3d/IronGate/Valheim/worlds_local, with a .db and a .fwl file per world. Want to use your own world? Upload both files to that folder and enter its name at WORLD NAME. You make players admins by putting their SteamID64 in adminlist.txt, one folder up.