With Simple Voice Chat, players talk to each other in the game. You hear players nearby, and the further away someone is, the quieter. With groups you also talk to friends who are further away.
Simple Voice Chat exists as a plugin for Paper, Purpur and Spigot, and as a mod for Fabric, Forge and NeoForge. The voice runs over its own UDP port. That is why you need an extra port as well as the plugin or mod.
Every player has to install the Simple Voice Chat mod in their own Minecraft, also when your server uses the plugin. Players without the mod can play normally, but can't talk or hear anything. Bedrock players through Geyser can't use the voice chat.
Step 1: Install Simple Voice Chat
On Paper or Purpur:
- Open your server in the game panel and go to Plugins.
- Search for
Simple Voice Chatand click Select version. - Pick a version that matches your Minecraft version and click Install plugin.
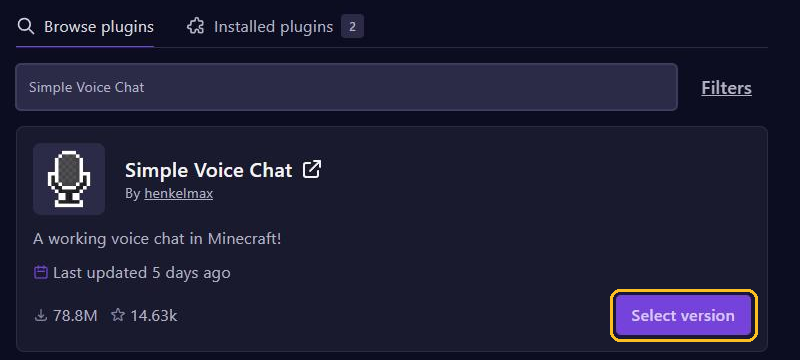
Does your server run Fabric, Forge or NeoForge? Then install Simple Voice Chat through Mods, see Install mods, modpacks and worlds. On Fabric you also need Fabric API.
Then start your server once, so Simple Voice Chat creates its settings file.
Step 2: Create an extra port
- Go to Network and click Create Allocation.
- Note the number of the new port, for example
25617. - Under Notes, write what the port is for, for example Voice chat.
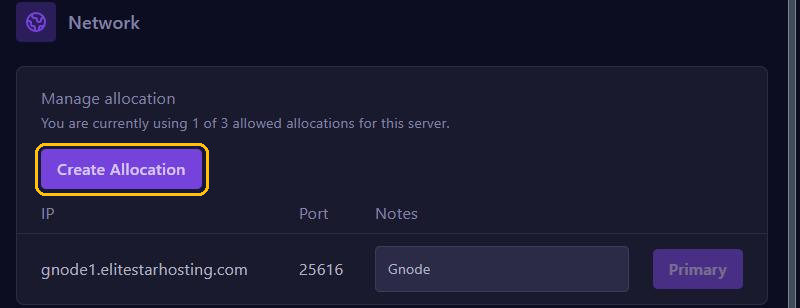
At the top of the page you see how many ports your plan allows. You read more about ports in Ports and allocations.
Step 3: Set the port
- Stop your server.
- In the File Manager, open the file
voicechat-server.properties. On Paper and Purpur it is in theplugins/voicechatfolder, on Fabric, Forge and NeoForge inconfig/voicechat. - Put the number of your new port after
port=. Leavebind_address=empty. - Save the file and start your server.
port=25617
bind_address=
Don't use -1 as the port. The voice chat then shares the port with Minecraft, which can make your server crash. Don't use the port of Geyser or another plugin either: every plugin that needs a port gets a port of its own.
Step 4: Talking in the game
Players download the Simple Voice Chat mod for their Minecraft version, for example from Modrinth or CurseForge, and install it with Fabric, Forge or NeoForge. Then they join your server.
- The first time, the mod asks whether you want push-to-talk or voice activation.
- V opens the settings. There you pick your microphone and speakers.
- With push-to-talk, you hold Caps Lock while you talk.
- G lets you create or join a group.
As an operator, you can check with /voicechat test PlayerName whether a player's voice chat is connected.
Not working?
- You see a plug icon or Voice chat not connected. The voice chat can't reach the server. Check that the number after
port=is exactly your new port and that you restarted the server afterwards. Only one player has the problem? Then that player's network probably blocks UDP, for example on mobile data or a VPN. - The server says Address already in use. Another plugin, such as Geyser, or the server query uses the same port. Give the voice chat a port of its own.
- The server says Failed to bind to address. Leave
bind_address=empty. - You hear players who are far away. You are in a group. Leave the group, and you only hear nearby players again.
- Others can't hear you, or you can't hear anyone. Pick the right microphone and speakers under V, and give Minecraft access to your microphone in your computer's privacy settings.
Useful settings
The same voicechat-server.properties file has more settings:
max_voice_distance: how many blocks away you can hear someone. 48 by default.force_voice_chat: set this totrueif players without the mod should be kicked from the server.enable_groups: set this tofalseif you don't want group chats.
Restart your server after every change.